
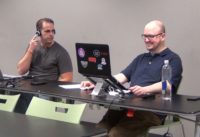
Jeff Mckaughan and Paul Murnane have made it through the preliminary round and it all comes down to this. They will match off against each other to determine who will reign supreme and take home first place at the first ever ZertoCon episode of Engineering Deathmatch. Watch to see who wins and don’t forget to look for George in our Where’s George? contest! Sponsored by Zerto and Echostor. Here’s the challenge that was provided to our contestants!
The Challenge:
Enterprises and Cloud Providers alike can utilize the Zerto Cloud Manager and Zerto Self Service Portal to configure role-based access control and multi-tenancy. In this challenge you will configure the Zerto Cloud Manager (ZCM) and Zerto Self Service Portal (ZSSP), then perform several ZSSP functions as an end user. Next up, you’ll witness some one-to-many protection, with failover tests to the local site. This showcases various use cases such as local file-level recovery, dev/test of software or patches before production deployments, or recovering from single server or application failure.
Environment Information
- Your laptop password is “ZertoCon”
- Use the “EDM 1 Site 01” Remote Desktop shortcut on the challenge laptop to connect to your Zerto Virtual Manager server
- There is also a Remote Desktop shortcut for Site 02 if needed, but shouldn’t be necessary
- (Local) Administrator / Zertodata!23
- Once logged into ZVM, you will find shortcuts on the desktop for the environment, including the local folder with challenge files and environment configuration information
- The first contestant to complete the challenge steps outlined below correctly wins! Race to the cloud!
The first contestant to complete the challenge steps outlined below correctly wins!
Ready, set, go..
Once connected the to ZVM Remote Desktop session,
- Login to Zerto Virtual Manager (ZVM) Site 01
- Pair site to ZVM Site 02
- Install Zerto Cloud Manager (ZCM) (you are installing on this ZVM – Site 02) using the installer shortcut on the desktop.
- Login to the ZCM portal (credentials are different than ZVM) by default)
- Add both ZVM sites within ZCM
- Create a Zorg on each site for the following “tenants”
- Zorg 1
- Name: Sales
- CRM ID: <blank>
- Zorg 2
- Name: Support
- CRM ID: <blank>
- Edit each Zorg and perform the following
- Add ZSSP credentials
- User: user1 (case sensitive)
- Password: password
- Add vCenter Cloud Resources from both sites — Each Zorg must have at least 1 network, datastore, and Resource Pool assigned from that site.
- Select “ZNest….VSAN….” datastore
- Select “VM Network”
- Add ZSSP credentials
- Zorg 1
- Select appropriate Resource Pool
- Login to each Zerto Self-Service Portal (ZSSP) to create VPGs
- Create VPGs. VPGs must be created from the source (protected) VM site.
- For each tenant, protect all the tenant VMs as a single VPG, with the remote site as the recovery destination.
- (This will be 1 VPG for Sales, and 1 VPG for Support)
- Sample VPG naming convention
- Site01Sales
- Site01Support
- Site02Sales
- Site02Support
- Use specific tenant resources
- Within each tenant Zorg, create a multi-VM VPG for all the VMs within the “tenant” (i.e. “Sales” VPG; “Support” VPG) and protect to the remote site
- One-to-many VM protection: Now switch over and log into ZVM
- ZVM Site 01
- Protect the Sales VMs, separately, to the local site
- (This will be 2 different VPGs)
- ZVM Site 02
- Protect the Support VMs, separately, to the local site
- (This will be 2 different VPGs)
- Perform a Failover Test of one locally replicated VPG for Sales, and one for Support.
- Protect the Support VMs, separately, to the local site
- Protect the Sales VMs, separately, to the local site
- ZVM Site 01
- For each tenant, protect all the tenant VMs as a single VPG, with the remote site as the recovery destination.


)